Friday 31 May 2013

A Guide to Using Striping Tape - Humbug Nails


Nails Inc Polish. Left - Colville Mews. Right - Richmond Terrace

Striping Tape


Arranging the striping Tape


The finished result - Left hand 


The finished result - Right hand


Price I Paid
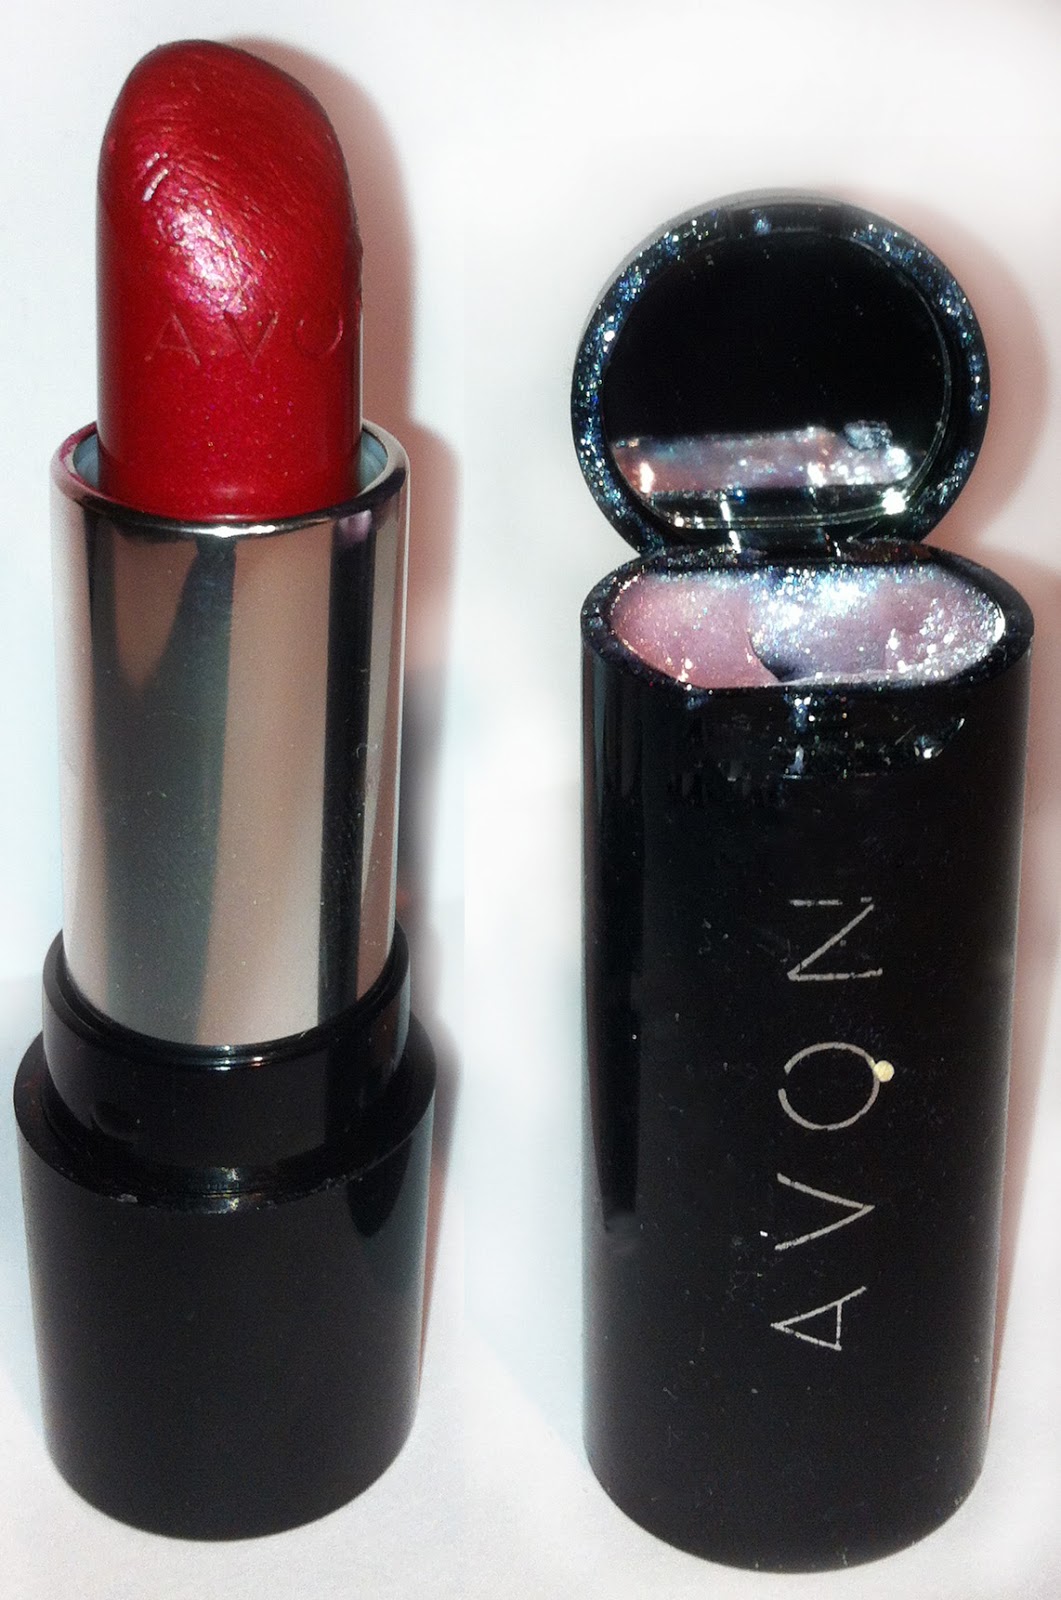
These are the mini versions which would have come in a set.  I have no idea how I acquired these but I have a feeling they are both my mum's nail polishes.  The full size products retail at £11 each.
The striping tape is very easy to get hold of on ebay and costs about 99p for a whole roll of it which would probably last 10 or so manicures so worth it!

Application
1. I applied Colville Mews nail colour and let this fully dry.  I had actually been wearing it a few days but I was a bit bored and supposed to be doing revision so ended up doing this over the top of it.  You can use any colour nail polish underneath or even leave it as your own nails if you want.

2. Cut the striping tape (you could cut thin strips of sellotape instead but as the tape is 99p on ebay so it isn't worth trying to cut it straight) into short lengths and rest them on the side on a table so you can easily grab them without ruining the nails/hand you have already painted.  Make sure theses are quite a bit longer than your nail so that you can easily remove them when you need it as that part will have to be a little speedy.

3.Place the strips of tape along the nails in a design you like.  It doesn't have to be too perfect as I have found it tends to just look good however you do it.  As you can see from the photo i just used a mix of vertical and horizontal stripes.  It is best to do one hand at a time.

Note: I recommend you do steps 4&5 for each nail separately rather than do all your nails at once for each step.  This is because when the polish dries even slightly it becomes quite hard to remove the tape.

4. Use your second colour, I used Nails Inc Richmond Terrace to paint over the whole nail and striping tape.  You need to use a contrasting polish that is quite thick because you won't have time to do a second layer.

5. You now need to quickly peel off the striping tape.  You have to do this within the first 30 seconds or so of applying the second polish over your design because as it dries it will seal the striping tape and you will end up with the polish dragging and it will leave a messy design.  Nails Inc polish was perfect for this design as it takes a little while to dry.  Fast drying polishes do not work well at all for this.
It is easiest to remove the striping tape with a pair of tweezers because it will be covered in wet polish and if you use your fingers it can get quite messy.
Keep in mind that if you layer the stripes such as in the boxy designs I used, when you remove these strips you will have to remove the ones you applied last, first.  This stops the first strips underneath being pulled.  I always apply the horizontal stripes first and then the vertical ones.  Then peel the vertical ones off first, and then the horizontal so I don't get confused.

7. Once the polish is dry it is probably a good idea to set it with a top coat as the design will feel lumpy where the striping tape was as there would only be the undercoat on those parts.  I don't have a decent top coat at uni so I did not do this.


Overall Reaction 
I really like this design - the stripes remind me of humbug sweets! This didn't take too long to do and is a fun way to spice up polish that has already been on for a few days.  
9/10


Thursday 30 May 2013

How Lipstick is Made

I am the kind of person who really likes to know how things are made and where they have come from.  In fact I actually did my whole university dissertation on it because I am just that keen.  But for anyone who is like me and thinks about how things are made here is a video from YouTube that I found on the manufacturing processes involved in making lipstick! It does not show the entire process which would include sourcing the materials or transporting them to a store but it is still pretty interesting.  If you are an impatient person it might be worth loading this video up and fast forwarding parts as some sections are a bit repetitive.  It is only 6 mins though.


Wednesday 29 May 2013

Nails Inc Nail Varnish in Colville Mews


1st Coat


2nd coat


3rd Coat and Bottle

Price I Paid
This is a mini version of the bottle that came in a set.  I have no idea how I actually got this colour as I didn't buy it myself which makes me think it is probably my mum's and somehow ended up in my room at uni? The full size bottle retails for £11.  There are frequently offers on with nails inc products so have a shop around.

Design
The bottle is really sleek, I really like this mini polish because the lid is quite small which makes the brush much easier to control than the full size versions.  Kits containing a few mini colours are great as i get bored of colours very quickly.

Colour
This is definitely my favorite nude polish out of the ones that I have tried.  In the photographs my hands were a bit cold and had gone kind of red.  Although you can still see that the polish is more of a brown hue, I would probably compare it to the colour of those fair skin coloured tights.  What i particularly like is that this polish does not contain any grey tones. I have a bit of an obsession with this because colours that are very light and slightly grey toned, along with my pale skin, remind me of those zombie's hands that burst out of the ground as they come back to 'life' in films.  Probably something a bit weird but I don't like to have dead looking hands!

Texture
Annoyingly this colour is very sheer and therefore required three coats to create an opaque colour.  Each coat dried in about five minutes so this was not particularly a problem as I was busy watching Waterloo Road on catch up.  That program is a bit rubbish but i'm absolutely hooked as I started watching from the beginning and have got to know the stories of all the characters.
In the past I have been very disappointed with Nails Inc and the lasting power of their nail varnishes.  I did not use a base or top coat  with these so that I could see how long the colour itself truly lasts.  It lasted okay, on the third day there was a slight chip which was a bit annoying but it lasted much better than the previous colour I tried which was Warwick Way.  I would probably use this polish again if my mum doesn't ask for it back!

Smell
As with all nail polishes it is best to open a window or paint your nails outside as it has a strong smell.

Ingredients
Nails inc do not make any effort to eliminate the dangerous chemicals in their nail varnishes in the way that Nubar and others strive to.

Overall Reaction 
I really like the colour of this polish and the lasting power is alright.  As with the previous polish it might do better with a base and top coat.
I would score this product 7/10


Tuesday 28 May 2013

A great way to repair smudged or dented nail varnish!


So you made a dent or you smudged your newly painted nails?


Take a little bit of any greasy product, I have used a little conditioner but it could be hairspray/moisturiser/makeup remover etcetc.  Lightly use a finger to rub (in a circular motion) the product over the dent to smooth it back out!


And there you go - dent/smudge free nails!  Although this will obviously only work if the nail varnish is still slightly wet so make sure you do this as soon as you spot the dent!

Monday 27 May 2013

What to do with a brown avocado?


The Mixture


Price I Paid
I would guess the actual cost of the mask would be about 25p but the avocados came in a pack of 4 that cost about £1.50.  

How to Make
This is really simple to make.  You just need to thoroughly mash up half an avocado with the back of a spoon/a fork, I think it is best to use one that is slightly over-ripe so that it is soft enough to mash.  Make sure you really mash it up though so that it becomes a smooth paste because otherwise it will be very hard to spread over your face.  I used an avocado that had unfortunately gone brown on one side and didn't look very appealing to eat at all and I would otherwise have binned.  
Don't leave the mask out as avocados go brown very quickly once they have been opened it is best to make this mask just before you use it.
You could add a teaspoonful of honey as that has great antibacterial properties or a teaspoon of natural yoghurt as the probiotics in that are good for your skin.  Another option is to add a teaspoon full of oats or any small seeds to make it into a slightly exfoliating facemask.

Application
I just used the palm of my had to rub it round my face in circular motions.  Keep in mind that if you have not mashed it smoothly enough it will not go down a bathroom sink when you wash it off so you might have to use the kitchen one.  Just be careful not to get it too close to your eyes and I would recommend tying your hair back.  I couldn't find a hair tie so I kept it back with my glasses as you can see.

Colour
An impressive looking bright green as you can see from the picture!  At any rate if you don't use it all up as a face mask you could always wear the rest to a costume/halloween party and go as Shrek (with the added bonus that it would turn brown after a few hours and you would get an interesting costume change too)!

Smell
Smelt like an avocado, surprisingly.

Overall Reaction 
After washing this mask off I noticed that my skin did feel very slightly oily but very thoroughly moisturised.  Avocados contain alot of natural oil which is great for moisturising skin and also contains omega-3 which is supposed to protect skin from some of the sun's harmful UV rays throughout the day aswell.  It also contains a large amount of vitamin E which is known for it's antioxidant properties and absorbing free radicals which cause damage to the skin.  My skin felt incredibly smooth after using it and it would be great for people with dry or combination skin.  Although I think this is a mask that anyone with very oily or blemish prone skin should steer clear of.  While making this mask I got alot on my hands and they now also feel very soft so you could consider using it as a hand mask for dry skin aswell!

I would rate this mask 8/10

Sunday 26 May 2013

Boots Natural Collection cover up stick (concealer) - Review and Swatch


Natural Collection Cover Up Stick

Swatch and coverage

Price I Paid
£1.99 a very reasonable price!

Design
This is a twist up stick, annoyingly if you don't twist it all the way down after application and put the lid on it gets stuck to the lid and then when you open it the next time the whole product ends up stuck inside the lid instead of the twist up holder in the bottom!  I have had to use a cotton bud a few times to un-stick it but I think for the price the product is still definitely worth it despite this design fault.  After looking at the reviews online I think most people agree that the product is good but the twist up design is faulty so keep that in mind.

Colour
I chose the colour fair because my skin is very pale but it also comes in medium.  This is great because it is quite a neutral colour once blended so goes well under any foundation.  It is always better to use a concealer slightly lighter than your foundation because it brightens your general skin tone rather than having dark patches where you have any blemishes. What I would say is that this cover-up is much better for lighter skin, the medium shade seemed to be a bit orange and the fair shade is very pale.  

Texture
This is a very creamy concealer with fantastic coverage! As you can see in the second photo when I drew a dark line on my hand using a brown pen and covered it with this product it almost totally disappeared which is great!   I often use this on its own to replace foundation just on my nose and cheeks to counteract redness in hot countries/winter because it stays put and doesn't become oily and run down my face or dry out plus it blends pretty easily too.  It might not be suitable for extremely dry flaky skin as it is very slightly drying but I think there is a liquid version of it that may be worth trying.

Application
I find it best to apply this straight from the stick in a circular motion to cover all of the blemish and then blend it in very lightly with my fingers just at the edges.  I leave it for a minute or two just to settle and then I apply my foundation.  When I apply my foundation I use my fingers to lightly pat it over the areas where I have used concealer as I find foundation brushes are a bit harsh and remove a bit of the concealer underneath revealing the blemish again.

Smell
This product is unfragranced and has no smell at all.

Ingredients
There is no ingredients list that I can find although it claims to be dermatologically tested, fragrance free and is from the natural collection range created by Boots so i doubt this would cause anyone any reactions. 

Overall Reaction 
I really like this product except for the very poor design of the packaging.
I would rate it 9/10.


Saturday 25 May 2013

An entire makeup bag using good quality products all for under £40!


Task: To create an entire make-up bag for under £40 using products found in Boots!

I will do a proper review on each product but these are staple products I think you would make up the basics of any great makeup bag.  Although it would be possible to find some of these products for much less, through years of experimenting I have found that if you buy the cheapest products ususally you are getting the cheapest quality as well and it is not worth it.  I have also added a couple of options to do a makeup bag for just under £47 if you like to use waterproof eye products.

Foundation
Bourjois 10 hour sleep effect foundation £9.99
A great light foundation I use shade 71 on a daily basis it is long lasting and great for most skin types apart from oily skin.  I have found this to be the best of the cheaper foundations.
OR
Bourjois Flower perfect £10.99
I use colour 71 and this is great for oily skin, I use this in hot countries as it leaves a nice matt effect that doesn’t look shiny throughout the day.  There is also a handy sponge on the lid for easy application.
I really like Bourjois foundations as in the past i have found other cheaper makes such as Rimmel and Maybelline foundations to be too orange toned for my pale skin.

Concealer
Boots Natural Collection cover up stick £1.99
This is a very cheap concealer but easily my favorite since I discovered it when I was about 15! It has very high coverage so easily conceals any blemish.  I always use this stick instead of foundation in very hot countries as it has great staying power and doesn’t melt off like most foundations.  Plus it is easy to fit in a small handbag for touch-ups where ever you are!

Blusher
Bourjois Little Round Pot Blusher £7.99
This blusher comes with a little brush which is great for applying I have used a few of the colours in the past and all look quite natural and blend easily.  They last absolutely ages and leave a really nice warm glow so it is well worth the price.

Brows
Rimmel Professional Eyebrow Pencil £2.99
I have this pencil in one of the lighter brown colours, it is great for filling in brows and has a little brush on the top which is useful!

Eyeshadow
Natural Collection Eyeshadow in Soft Pink £1.79
This is a really nice light pink colour that is very subtle and just brightens the eyes a bit to make you look refreshed during the day.   The dark colours from this collection are not as good as the light ones.

Eyeliner
Barry M Bold Waterproof Eyeliner £3.99
I no longer use this eyeliner because I have fallen in love with the Chanel/MAC waterproof ones so I don’t currently have one to do a review on.  I buy more expensive noes because I frequently wear contact lenses and my eyes water a lot and I find all of the cheap eyeliners run.  But I used to use this proudct a lot and it does do a good job and last all day if your eyes aren’t constantly watering so I do think this is one of the best!
OR
Rimmel Exaggerate Eyeliner £5.29
If you have a steady enough hand I would certainly recommend this product because it lasts for ages and glides on really easily.  They have recently brought out a waterproof version of this so I might try that one at some point.

Mascara
Maybelline Great Last Blackest Black Mascara £4.99
This mascara is a great day mascara because it has a convenient small tapered brush and doesn’t get too clumpy.  As with eyeliners I have problems with my eyes watering so although I love the formula of this mascara I no longer use it.
OR
Max Factor False Lash Effect Mascara £10.99
This is my favourite mascara as their waterproof version does not budge.  It is quite difficult to get off though and I find I have to use a very oily makeup remover but it does such a good job I really don’t care.

Lipstick
Barry M Lip Gloss wand £4.49
This is a great everyday product in a sheer colour that would suit anyone and is a little bit moisturising without being sticky.

Friday 24 May 2013

Stippling Brush VS Foundation Brush Review and Swatch


MAC 190 Foundation Brush


Close-up of MAC foundation brush


Real Techniques stippling brush


Real Techniques stippling brush


Left - Swatch of MAC 190......... Right - Swatch of Real Techniques stippling brush


The purpose of this review is to highlight the differences between flat paddle foundation brushes and stippling brushes when applying liquid or cream foundations.
In the photograph above I applied one pump of Bourjois 10 hour sleep effect foundation in shade 71 to two sides of a piece of paper.  I then blended the foundation in the same way I would on my face to show off the blending effects of each brush.

Price I Paid
MAC 190 Foundation Brush - £26
I have had this brush for about three years and it is still in perfect condition, it washes easily and all the bristles are still as new.
Real Techniques Stippling Brush - £10.99 
I have only owned this brush for about three weeks but it is not as good as MAC quality brushes but you get what you pay for.  

Design
MAC 190 - This is a really sturdy, high quality, flat paddle brush and has been my go-to foundation brush for the past three years.  The bristles are flexible and soft so it is very gentle on my skin.  It is best to apply the foundation from the centre of the face outwards and then blend in long line strokes.  It creates great foundation coverage as you can see in the photo above, it applies a thick layer of foundation perfect for covering skin imperfections. The bristles are flatter and more rigid than the stippling brush so it is far more prone to streaking.  I also have found that i struggle to blend foundation properly on the curves of my face e.g jaw area which creates the dreaded line, one of the main faux pas of wearing foundation.   I have found the best way to tackle the streaks that occur as a result of this brush is to lightly blend my makeup by lightly sweeping my fingers/a large face brush over my entire face.  Saying that, it fits very easily into a travel makeup case and has done me well for the past three years. 

Real Techniques Stippling - As you can see from the picture above, when blending foundation this brush creates a far superior, smoother and streak free effect than a normal foundation brush.  For me this is the holy grail of foundation application as it is pretty much foolproof as long as you don't miss a spot! It is difficult to apply liquid foundation from a pump directly to this brush so I find it easiest to squeeze the foundation out onto my face first and then blend it in which is a bit tricky.  If I wasn't so lazy, I would squeeze my foundation out onto my hand or a clean solid surface and pick the colour up onto the brush from there.  For a streak free look it is best to work the foundation in small circular movements from the centre of the face towards the outside.  I really like the Real Techniques version of this brush as it is the perfect size for application as it easily fits into the contours of my face and the bristles are nice and soft.  It creates a very different coverage effect to the foundation brush and gives a much lighter coverage airbrush effect.  I find this is great for concealing the little pores on my nose and any dry skin as it lightly skims over it all without causing a dry and flaky caked effect.
I have only had this brush for a few weeks but I have a feeling it will need replacing more frequently than my MAC foundation brush as one or two bristles have already fallen out.  There is a MAC stippling brush and I did consider buying it but it cost around £30 so I thought that for that price i could have had three of the Real Techniques brushes so as I am a student on a budget it is not worth the investment.  The only real downside to using a stippling brush over a flatter foundation brush is storage, it really needs to be stored upright (the base is flat so it stands on its own!) or in a little case in a makeup bag because the bristles get squashed very easily so this brush is a bit of a pain to travel with.

Colour
The MAC brush is a smart black colour and the bristles are roughly the same colour as my foundation which i find appealing as I don't wash my brush after every application more like just once a week.  The Real Techniques brush is mostly a girly hot pink colour but the bristles are black with a white tip.  I find this a little annoying because they go from white to the colour of my foundation and that makes me constantly paranoid my brush is dirty.. although maybe that is a good thing because it makes me wash it even more!

Ingredients
The MAC brush is a blend of natural and synthetic fibers and the Real Techniques brush is made of purely synthetic fibers.  Although you might think that natural fibers would be best, synthetic fibers are considerably easier to clean than natural fibers!  

Overall Reaction 
MAC 190 Foundation Brush - 8/10
The flat paddle foundation brush suited me well for the past three years but after discovering the effects of a stippling brush i have permanently made the swap!

Real Techniques Brush - 9/10
I love the effect from using this brush although I did not give it 10/10 because I don't think it is of the same quality as my MAC brush but to be fair it was 1/3 of the price so i'm not complaining!  

Thursday 23 May 2013

Elvive Nutri Gloss Intensive Shine Masque

The pot contains 300ml of product, definitely not travel size!

The product itself

Price I Paid
This product was £5.19 and contains about 30 applications in my opinion.

Design
The pot is quite big although it was filled to the brim with the product and therefore very good value!  What i particularly like is the way that the lid clicks when it is properly shut so you know that it is secure and won't leak or dry out.

Colour
The masque is light pink which makes it quite an appealing girly product although it does not look very natural but that didn't worry me.

Texture
It is VERY thick so you probably need just a couple of blobs of this product.  My hair is quite fine though so  if you have long, thick hair you would probably need a bit more.  I left the masque on just the ends of my hair for a few minutes after shampooing my hair in replacement of my usual conditioner. It is very moisturising and my hair is fine, dry and coloured but it can get greasy easily if I use a very heavy product on it so I found this perfect as it washes out easily after use.  This product did give my hair a great boost but I have limited myself to using it only once a week because it does leave a very slight moisturising residue that is hard to fully rinse out and this would build up too much if used daily.  I find this residue continues to nourish my very dry hair after my shower but this product is probably unsuitable for very thick oily hair as the fact that it does not fully rinse out and that would add to the problem.

Smell
I can't quite work out what the smell is it is a little fruity, possibly raspberry?

Ingredients
Contains real natural oils rather than just silicones which is great for moisturising! It also claims to contain pearl protein which loreal claim "penetrates the hair to targeted care for the hair fibre."  I don't think this really has any meaning to it although pearl protein is used in certain hair loss treatments so there must be some science to it!

Overall Reaction 
I really like this masque, it is ideal for my hair type and makes my hair much softer than it usually is.
For me, I would rate this product 9/10


Wednesday 22 May 2013

Avon Spiced Wine Pro Luscious Pout Lipstick/Gloss Top Coat with Mirror Review and Swatches


Avon spiced wine bullet lipstick and lid with gloss and mirror


Application


Effect of lightly running a finger across the lipstick


Swatches of the lipstick and gloss on my arm 

Price I Paid
The pot with the lip gloss was limited edition and I bought it for £4 although this edition can still be found in clearance magazines.  The lipstick spiced wine can still be bought online just without the gloss.

Design
The lipstick is conveniently shaped and to create a defined lip line and I think the idea of a small mirror in the lid is great for checkups.  The gloss in the lid is also a great idea in theory as well!

Colour
I really like the colour of this red as it is exactly as the title described, more of a wine colour rather than a ketchup red.  The gloss is very glittery and the colour does not match up with the red at all, I really don't understand the point of it with this lipstick colour which is probably why they have discontinued the gloss part of this.

Texture
The lipstick is really creamy and does not dry out my lips although this is a really tricky colour to keep in place especially if I plan to eat or drink anything while out.  It smudges incredibly easily and as I have quite long hair I find I end up with streaks smeared all over my face after a few mins.  The gloss is very sticky and glittery and it is impossible to apply over the lipstick without smearing it all everywhere rendering it completely useless.  I have not worn this lipstick since the day I bought it because although I really like the colour I ended up looking ridiculous while I was out because it smudged and stained my skin and this staining wouldn't come out with water so I ended up giving up on it and carefully wiping it all off.

Smell
No particular smell at all.

Ingredients
Avon products are often quite harsh on the skin so if you have very sensitive I would be careful of this product as I found the formula stains skin.

Overall Reaction
I really like the colour but the formula of this lipstick is a real pain.
I would score this product 1/10


Monday 20 May 2013

Clean and Clear dual action moisturiser


Price I Paid
£3.59

Design
A pretty basic cheap bottle, not too exciting.  I found the wording fades very quickly if you leave it on a shelf in sunlight.

Colour
White, easily goes clear when spread out on face.

Texture
Quite a thin liquid, has lasted me a reasonable time although I do only use it on occasion.  This product is oil free which is great if you need to moisturise but have skin that is prone to breakouts.  It does not provide alot of moisture so for my slightly dry skin it doesn't help too much but it is very light and definitely not greasy.  My skin is generally quite clear now I am 21 but sometimes I use this when I have used an oily product on my face during the day and don't want to use a thick moisturiser after taking it off.
Smell
Unperfumed, but it smells a bit like rubber which I don't really like.

Ingredients
No offencive ingredients.  None that are notably good for skin either, or that prevent spots.  I think of it as a moisturiser that wouldn't aggravate spot prone skin rather than something that actively prevents them.

Overall Reaction
This product is okay, I wouldn't bother to repurchase it.  Although for the cheap price, it pretty much does do what it says on the bottle.
I would score this product 5/10


Sunday 19 May 2013

Estée Lauder Perfectly Clean Splash Away Foaming Cleanser


Price I Paid
This is a 30ml trial version of the product, however the full size product is 125ml and retails for £22.

Design
A squeezy bottle that makes it easy to dispense a small amount of product at a time.  Would look smart on a shelf.

Colour
The product is a pearlescent white.

Texture
The cleanser is very thick so only a tiny amount was needed to cover my face a pea sized amount was perfect.  The trial size has lasted me about three months which is good. When you splash your face with water it turns into a thin foam that easily washes away.  I was very impressed with this product because it left my skin squeaky clean, and i mean squeaky!!  It also removed the last of my makeup/ leftover makeup remover.  Only negative is this product slightly stings if you accidentally get it in your eyes so be careful.  Another thing to note is that after thoroughly cleaning all the natural oils etc off your face, it is important to moisturise properly soon after.

Smell
Smells very fresh quite a mineral smell rather than flowers or citrus.

Ingredients
White Water Lily - Known for skin calming properties as the roots contain a kind of mild steroid that would act as an anti-inflammatory.
Senega - A white flower, although it is the roots that are used in some traditional  Chinese medicines known to reduce stress and calm the skin.
Barberry - This is the berry of a thorny shrub.  After some research I think that the main benefit of this ingredient is antibacterial properties.  

Overall Reaction
I really like this product, it is a little pricey although I think it would be worth it as a product to use every few days that really deeply cleans your skin.
I would rate this product 9/10

Saturday 18 May 2013

Benefit Dr Feelgood velvety complextion balm - review


The tin lid, product and sponge


Price I Paid
I paid £13 for this product as an offer on asos.com although it usually retails for £22 and I have never seen it reduced before this.

Design
The tin has quite a flirty design on the front I guess to implicate that it makes your skin irresistibly soft.  It is quite a large tin in order to encorporate the sponge, so is in actual fact only half full of the product.  The sponge is completely useless and I actually think is quite unhelpful because this is a product you apply over makeup so the sponge ends up covered in what you have already put on and smears it all round your face.
Colour
In the tin it looks white, and I found if I don't rub it in properly it creates a kind of white film over my makeup.

Texture
I am not very keen on the texture of this product to be honest.  Although it is supposed to make your skin look flawless, it actually makes my slightly dry skin a bit flakey.  It does however absorb oil so if I apply it to the parts of my face that get slightly oily it does a great job.  I think this is the perfect product for someone who does not use alot of makeup who has oily skin and wants to stop shine.  I would imagine it would also be great for preventing makeup running in hot countries so I will update you after my next holiday!

Smell
Smells of lemon, not too strong and after a few mins no scent at all.

Ingredients
Contains vitamins A, C and E.

Overall Reaction
Personally I don't really see much point in this product, it has probably been a bit of a waste of £13.  Although I may feel the "benefit" of it on hot holidays and raise this score in the future.
Overall i would rate this product 2/10.


**********update**********

I have just come home from a holiday in Mallorca where it was 30+ degrees centigrade.  Initially I thought that this product might be good for hot countries but now I know this is not the case.  I tried it out on a night out there and it was a disaster. I ended up wiping all my foundation off and having to try and re-apply it without the balm and after a few drinks, using a tiny mirror in the toilets of a club.   A completely useless product that is destined for the bin!


Thursday 16 May 2013

Bourjois 1 seconde Gel polish in Coral - Review


The bottle


The brush


Polish after 3 days of wear


Price I Paid
I paid £5.99 for this polish although at the time there was a "spend £12 get a free blusher deal" on so i bought a few things and got the free gift that I will review later.

Design
The design of the bottle is good, I like the long pointed lid because it makes it very easy to control the brush attached.
The reason this polish is called 1 seconde is because the brush is shaped in a way that makes it easy to paint polish on your nail in one second.
Colour
It is quite a nice peachy orange, it isn't too bright and garish so goes with most outfits.  It has a hint of gold shimmer which makes the colour perfect for summer.  Unfortunately because the polish is so thick the sparkles do slightly sink to the bottom as it is drying so they are very subtle.  It is not as shiny as some polishes which i think is a shame as it would really finish of the look but it could easily be coated with a shiny top coat.  There are a few colours in the Bourjois gel polish range although currently they are limited to about 7/8 quite strange colours such as yellow and bright gold which I think is a shame although i'm sure they will bring out a better selection soon enough.

Texture
Although the gel title gives the impression that it has something to do with the uv cured nails you might get at a salon, what it means is that polish is much thicker than their usual range of polishes.  This consistency does make it a bit harder to apply but the handy brush makes up for it.  It claims to dry in about 50 seconds and it is touch dry in that time but after doing two layers i have found it needs about 30 mins to actually be dry enough to go about day to day activities without damage.  Probably best to put this on during your favourite tv show and by the end it would probably be dry.  Although this drying time is a bit annoying I do normally do my own actual gel nails and therefore I found the thickness of this gel to be a real positive.  Normally my manicures stay on for about 3 weeks so it was refreshing to find a polish that has lasted 3 days with only one minor chip and can be left on for around 7 days with only the odd touchup.

Smell
Smells quite strongly for a nail varnish, definitely keep the window open or polish your nails outside after using this one.

Ingredients
I know very little about the ingredients but Bourjois is owned by Chanel and both are well established brands.  Therefore i would think that the ingredients in the products have been thoroughly tested for skin reactions etc.

Overall Reaction
This polish has incredible staying power, just a shame there aren't better colours!!
9/10


Wednesday 15 May 2013

Avon Ultra Colour Rich Brilliance Lipstick Berry Glitz - Swatch and Review


 The lipstick itself


Swatch on my hand of the colour


What the colour looks like on me


Price I Paid
£4.00 on offer half price.  RRP £8.  Avon always have offers on their products so I have never bought any full price it is better to wait a month and buy it when it is on offer as I found there are deals on each product every other week.

Design
A slightly strange title of "ultra colour rich brilliance lipstick," i don't think it required so many adjectives.  The container is very smart and feels reasonably high quality.  The pink colour makes it easy to find in a handbag which is good because I carry around some huge bags and things always get lost in them. I feel like Mary Poppins whenever I fully empty them because I find loads of things I had completely forgotten about.
One issue I had with this product is that there isn't very much of it on the stick and compared to other more expensive brands and it gets used up very quickly.  Although for the £4 price i paid still think it is good value.
Colour
It is often better to test avon products by finding a representative and trying out their samples. or look up swatches of them online before purchase because the colour swatches online and often in the catalogues almost never match up properly to the actual product!
This colour is a really pretty pink, I think the colour title "berry glitz" is a bit misleading because it is a slightly darker than bubblegum pink so i'm not sure what berries they would be talking about!  What i really like about it is that it has a little glitter in it, not a tacky amount but enough just to add a real shine to your lips.  The glitter is kind of mirrored but seems to reflect pinks and blues, which I really like in a lipstick because blue hues tend to make teeth look whiter which is an added bonus!
Texture
The texture is what I love most about this lipstick.  It glides on very easily and really moisturises unlike alot of other lipsticks so it is perfect for dry lips and i used it almost every day during winter.    Another positive is that it wears off evenly, although it does only last two or three hours for me and wouldnt survive a whole meal.

Smell
Doesn't smell of anything really perhaps very slightly flowery.

Ingredients
Contains vitamin E and jojoba oil which gives it it's moisturising properties.

Overall Reaction
I really like this lipstick as daywear, only downside is that it gets used up quite quickly and there isn't alot to begin with so i would not want to spend the £8 on it. 
Paying £4 for this product i would score it 9/10