Wednesday 31 July 2013

Benefit BadGal Eyeliner


The eyeliner itself - lid is a bit wonky because I have already used half of it up!

The eyeliner on my eye

Eye shut

The eyeliner drawn on a piece of paper


After rubbing it slightly with my hand

Almost all of it has gone!

Price I Paid
£15

Design
This is a pencil eyeliner, it is quite a thick eyeliner which is good for creating a smokey eye look rather than a defined, clear line.  You will need to buy a large sharpener for this pencil which is annoying.

Colour
A rich black, the colour is intense!

Texture
The texture of this eyeliner is good and bad.  There are so many rave reviews about it so when I had the opportunity to try it I was so disappointed.  The good part is that it creates a nice smokey look quite easily and glides on smoothly.  
The bad part is that my eyes were already slightly watery because I have the dreaded hay fever at this time of year.  To be fair this product does not claim to be waterproof they actually have another pencil that does so this may be partially my fault.  What I could recommend this eyeliner for would be any makeup artist interested in creating a horror film because it created perfect black mascara drip tears down my face as soon as they started watering.  I think that anyone with oily skin should also avoid this product as it has hardly any staying power whatsoever.

Overall Reaction
It is not long wearing but it would look great for a few minutes for a photograph or for longer if you are acting in a horror film.
3/10

Tuesday 30 July 2013

Further Contouring

These next few steps will show you how to even out some more advanced features.  You can add these additions to the original contouring post that can be found by clicking here.


Double Chin
Shade underneath the face to hide a double chin slightly.  Highlight the centre of the chin to move the focus towards the face and away from the shading underneath the face.


A Longer Nose
To hide a longer nose shade just under the tip of it to take the emphasis away from the botttom of it and reduce any shine that might usually make it more obvious as well.


A High Forehead

To hide a higher forehead shade over all of it close to the hairline reduce the size.


A Wider Nose
To reduce a wide nose shade over the sides of it slightly to slim it.


A Wider Forehead
To reduce the size of a wide forehead shade either side of it as shown in the diagram and this will balance it out with the rest of the face.

Sunday 28 July 2013

Contouring For Face Shape


What is Contouring?
In the makeup industry, the idea face shape is considered to be the perfect oval.  The point of contouring is to highlight and shade the face to create a more "desirable" face shape.  I personally think that the concept of trying to alter your face shape in itself is not desirable.  In my opinion contouring should be used for what the name suggests, create a sense of depth to the facial features.  E.g by highlighting cheekbones and shading in temples you create a toned more interesting face.

Understanding the diagrams below

1.Do these steps after your usual foundation/concealer routine.
1. You need to decide on your face shape.  I have focused on the four main face shapes, heart, long, round and square. Look at the pictures and decide which one is closes to your own face.
If you have a perfect oval face you should just stick to using the blusher tutorial on its own.
3. The diagrams show the face shape and then the dark brown patches emphasise the areas to contour and the white areas emphasise the areas to highlight.  


How to Contour
To contour the face you need to buy a foundation one or two shades darker than the one you usually use.  You need to look for a foundation with the same yellow/pink undertones as your usual foundation so it is often best to stick to the same make.  You can also use a darker brown powder/cream but you must use this with a very light hand otherwise it will look like you have strange patches on your face rather than countours that just add depth.
Using a darker colour to shade in areas of your face will slightly hide certain sections.  Using it in this way will emphasise the lighter sections of your face even more. 

How to Highlight
To highlight you need a foundation slightly lighter than your usual one, again with the same undertones as your original foundation.  Or what is best is to buy a lighter powder or invest in an actual highlighter such as Benefit High/Moon beam.  Highlighters are usually just a slightly lighter, sometimes shiny cream that will brighten and lighten certain parts of your face.


Heart Face

A heart shaped face is wider at the top than the bottom.  So the aim is to shade in the sides of the face by the temples to create a narrowing effect.  At the same time you can shade slightly around the chin to add a little extra depth and balance out the shading at the top sides of the forehead.

You should highlight above the cheekbones to widen out the center of the face and create a focus towards the middle.  Also you might want to put a tiny bit of highlighter just on the chin as a balance so you do not just have highlighted cheeks.  Do not put any highlighter on your forehead as that will make it seem wider.


Long Face

When contouring a longer face you want to try and give the impression of a slightly shorter face so you shade out and contour the bottom of the chin and the top of the forehead.  Do this very lightly so that it is subtle. 

To widen the face at the center it is a good idea to highlight just above the cheekbones.

Round Face

A round face needs more difficult contouring to give the impression of more defined features. You should shade the two edge sides of the forehead to create a more oval shape to the face and contour underneath the cheekbones to make them even more prominent on the face.  You can also shade on the sides of the chin for a little extra depth.

You should highlight the forehead in the centre as a curve to create the impression of a longer forehead and highlight the centre of the chin as well to extend the face downwards from the middle. It is also a good idea to highlight the cheekbones to add some height to the center of the face.


Square Face

Contouring a square face is to soften the features up for a less defined look.  You can shade in the top countours of the forehead to soften the angles and the jawline to do the same at the bottom of the face.

You should highlight the cheekbones, middle of the chin and forehead in a circular design to round out the face a bit.


Saturday 27 July 2013

Illamasqua Nail Varnish In Jan

The Bottle

One coat of the polish


One coat of polish


The brush


Two coats of colour


Two coats of colour

Nails after three days

Price I Paid
This retails at £9-14 depending on where you shop.

Design
The bottle looks quite smart a bit like the Chanel glass bottles but obviously with the Illamasqua logo on.  The brush is pretty thin and rubbish unfortunately which made application more difficult but this might be good if you have very small nails.  What was really odd was that the lid fell off after the first day and I have no photo of it but I am now left with a brush attached to what looks like the inside of the cap? I can't work out if this is supposed to happen!

Colour
I really like this colour varnish it is quite unique and I have never tried it out before.  It seemed to go with almost everything I owned which was nice.  

Texture
This nail polish is very opaque and I could almost have got away with just using one coat!  It lasted three days without chipping but on the fourth day I ended up with a huge chip on my thumb and alot of the polish seemed to come off all at once.  Even so for the three days it lasted it did pretty well and looked great.  It was not a shiny as other polishes I have but I think that added to the charm of the colour.

Smell
Nail polish smell..

Overall Reaction
I was very impressed with this polish and would probably consider buying Illamasqua polishes again.  The only slight problem is that Illamasqua is a theatrical make and therefore a lot of the colours are quite "quirky" and not suitable for everyday wear.
9/10


Thursday 25 July 2013

A Really Basic Bloody Mary

Ingredients
  
Quantities


Final Drink


Price I Paid
£1 for the whole carton of tomato juice.  I think the longer life cartoned juice tastes better for this than the fresh juice but that is just up to you.
£1.69 for the whole bottle of tabasco sauce
£1.80 for the whole bottle of Worcestershire sauce
Optional - Shot of Vodka for the alcoholic version


How to Prepare
Two or three drops of tabasco - more if you like it quite spicy!!
A good splash of Worcestershire sauce
Optional - add a shot of vodka 
Fill up the rest of the cup with tomato juice and stir!

Colour
Bright blood red as the name suggests!

Taste
A spicy tomato drink!

Overall Reaction
This is a really quick and healthy drink to make (minus the alcohol if you added that)
10/10 

Tuesday 23 July 2013

Hotel Chocolat Cherry Deluxe Chocolates - Review


Price I Paid
£3.50

Design
Quite a nice design, nothing special though

Colour
White amaretto truffle and a kind of red kirsch cherry jam?

Texture/Taste
It is described as a succulent kirsch soaked cherry surrounded by silky soft amaretto truffle.  After looking at the reviews online it is clear that this chocolate was once as it should have been but although I still enjoyed it, it was not quite what I was expecting.  It is described as being a cherry soaked in kirsch but it is actually cherry and kirsch jam which is disappointing.  The chocolate is nice and so is the amaretto truffle filling but I would have much preferred an actual cherry as this is supposed to be a luxury brand!

Overall Reaction
Its not bad, but I have had better and cheaper versions of this particular product.
6/10

Sunday 21 July 2013

Lucky Chip Keyring from Las Vegas


Price I Paid
This was a gift from a friend from Las Vegas!

Design

It is a bright pink and white diamonte casino chip which I think perfectly sums up what Las Vegas is all about!  It is certainly easy to find in my handbag and as it is a lucky chip, hopefully next time I find my way into a casino it'll send the luck my way!

Overall Reaction
I love it as it is a really cute little souvenir, and reminds me of my amazing university friend who got it for me!
10/10

*****Update 05/08/2013******
I played blackjack for the first time in a casino on a cruise I have just come back from on the Queen Mary 2 and won $11.50 so this really is a very lucky chip to have!! Although unfortunately my brother then went and lost it bar $1.50 all so I guess the next person we know to go to Las Vegas I'll ask to get him one aswell!

Friday 19 July 2013

Dirty Works Lip Plumper


Price I Paid
£5.99 in Sainsburys

Design
The packaging is quite funny and definitely caught my eye while I was in the shop.  It applies with a normal lipgloss wand, the outer packaging is funny but the bottle itself is actually quite plain.

Colour
The actual lip plumper is clear.

Texture
There really is no texture to this product, it is completely rubbish.  I used to have a product from Boots that did a similar job to this and it really worked but this is an awful replacement for it and is only £1 cheaper.  It did nothing to my lips apart from make them tingle for all of about ten seconds.

Smell
I thought if it didn't work as a lip plumper I could at least use it as a clear lip gloss for putting over a lip stain which is what I had originally bought it for.  It is supposed to smell like orange and chocolate which you would think would be quite nice but it actually just smells like deep heat and it is quite a potent smell so I can't even use this as a lip gloss.

Overall Reaction
I bought this a while ago but I still might well try and take this back it is so awful!
0/10

Thursday 18 July 2013

Applying Blush For Your Face Shape


The first thing that you should know when applying blusher is where your cheekbones are.  You can do this by feeling along your cheeks and it is the bone that sticks out the highest running from your ear to roughly the edge of the tip of your nose.
It is also important to know where the apples of your cheeks are.  To find this out you should smile and it is the fatter, circular, central parts of your cheeks. When looking for the apples of your cheeks also check that when you stop smiling they have not dropped down on your face. If you find the apples of your cheeks are lower when you stop smiling place the blusher very slightly above them.
Next decide what outcome you want to achieve by using blusher by selecting one of the four techniques below.


1. Lifting The Face


This is the most common application style of blusher this style lifts the face upwards giving a fresher look..  Apply the blusher directly above your cheekbone to create the illusion of more pronounced cheekbones.  


2. Slimming The Face

This style of blusher is used to slim down a wider face.  By applying the blusher very lightly in a line down each side of the face near close to the nose, it gives the illusion of a slimmer face.  Do not apply this technique with a heavy hand or it will look strange.  Use a light sweep of blusher and blend it well.


3. Exaggerating The Angles Of The Face

This is best for those with a rounder face as it will exaggerate angles of the cheekbones to create more shape.  Apply the blusher slightly underneath the cheekbones to create this effect.


4. Soften The Face

This technique is to soften a face with angular features and create a young, dewey look.  Use just a little blusher on the apples of the cheeks and blend in well.


Wednesday 17 July 2013

How I Apply Liquid Eyeliner

This is just a quick video to show how I like to apply thin liquid eyeliner.  When I apply a thicker line I apply it differently and will make another video soon.  I am not very good at doing makeup videos yet because I haven't had much practice and it is hard to see what you are doing and look into the camera! The reason it is in black and white is because when I took the video the light was far too bright and putting it in black and white makes it a little clearer.

Steps for liquid eyeliner:
1. Make sure there is lots of product on the brush (not so much that it is about to drip) but you need a good amount so that you do not end up with blank patches and can get a nice even line.
2. Apply it in short feathery strokes as close to the eyelashes as you can.  I like to start from the center of my eyelid and work towards the edge and then go back to do the inner corner to the middle.  I find this easier because then I can judge how thick the line on one side was and match it up to the inner part suitably.
3. Try not to suddenly open your eyes/sneeze/look up etcetc because it will transfer onto your upper eyelid if it has not dried properly yet!
4. I find it easiest to look down into a mirror and stretch out my eyelid with my other hand so that my eyelid is not creased.  Putting a line of eyeliner straight over the creases in your eyelid will create jagged lines when you open your eyes.


Tuesday 16 July 2013

Striping Tape Giveaway! (UK only)

Enter my competition for a chance to win a roll of pink striping tape!! (UK only)
Check out the tutorials here..
Tutorial
Princess quilted nails


Monday 15 July 2013

Blue Cheese and Rocket Pasta


Price I Paid/Ingredients 

1 packet of Rocket £1 (half used for the dish)
1 Packet of 150g Galbani Dolcelatte Classico which is a very soft blue Italian cheese £2 click here to buy.  You could make this with a harder blue cheese but it might be much more difficult to melt and you would probably need to add more cream.
Roughly 5 tablespoons of thick whipping/double cream 70p
Ground nutmeg 1 teaspoon.  Whole jar retails at £2.
2 teaspoons olive oil
Tagliatelle 1 large pack 80p 
2 saucepans
Optional: lemon juice

The whole dish for 4 people probably cost around £6

How to Prepare/Cook (about 10 mins altogether)
1. Put the water in a large saucepan and put on a high heat. Once boiling, add the tagliatelle.  It is a good idea to use a thicker pasta such as this because the sauce is very strong and you want a bit of substance to the pasta itself, spaghetti etc would not be as tasty but you could still use it.  The pasta should take about 10 minutes to cook but look at the packaging for instructions.  Make the sauce while it is cooking.
2. In a small saucepan, add two teaspoons of olive oil and turn the heat up to a reasonably high setting e.g gas mark 8.
3. Then turn the heat down to about gas mark 5 and add the entire block of blue cheese to the pan. 
4. After about 20 seconds add the 5 tablespoons of cream.  Add more/less depending on how thick you want the sauce to be. Continuously stir the mix with a fork to break down the cheese and if you need to turn down the heat to stop the cheese burning on the pan as it should melt at quite a low temperature.
5. Add the teaspoon of nutmeg and squeeze half a lemon over it if you wish.
6. You need to act pretty quick once the sauce is done as it starts sticking to the saucepan as soon as it is taken off the heat.  I recommend leaving it on gas mark 1 while you sieve and serve the pasta into the bowls.  Put a good handful of rocket onto each bowl of pasta and finally pour on the sauce.  The rocket should be cold because it gives the pasta a lovely texture to stop it feeling so stodgy.
7.Serve!

Colour
The sauce is an off white colour and so is the pasta, the green rocket really lifts the dish to make it more colourful and exciting.  Rocket is also really pretty as the edges of the leaves are quite dainty looking!

Taste
If you don't like strong blue cheese, this is not the dish for you! However, if you are like me and absolutely love blue cheese then you should definitely try making this as it is really quick, tasty and simple to make.

Smell
A big drawback to this dish is that if you hate the smell of cheese you probably won't want to cook this in your own kitchen.  My mum actually complained about the smell as soon as she walked in the door from work.  She blamed my dad for having really smelly shoes at first but after a while she realised it was actually my cooking.  Having said that, if you can put up with the smell this dish is so yummy it is definitely worth it.

Overall Reaction
I had never really made this dish before but it was incredibly quick and easy to make so I will certainly be recreating it in the near future.
10/10


Sunday 14 July 2013

Cadbury's Milk Tray


Price I paid
About £7

How to Prepare
Just open the box!

Colour
Brown..

Taste
Hmm I love Cadbury's chocolate but I am not actually convinced by this selection.  The chocolates are absolutely tiny for the size and price of the box there is probably more plastic packaging than chocolate.
I hate fake strawberry/orange flavoured creams in chocolate which rules out two of the options already. It reminds me of Calpol which is a medicine and as much as I would love to compare chocolate/sweets to being a medicine this is one step too far even for me.  Another issue is that I absolutely cannot stand turkish delight it is anything but delightful, it is disgusting.  Turkish delights lurking in chocolate boxes like these actually offends me.
The other flavours are really plain and boring, the only one that I really enjoyed was the honey caramel one. You are better off buying a bar of dairy milk than this tray.

Smell
Um.. like chocolate

Health Benefits 
In small quantities eating chocolate is fine, in fact it does have some benefits and out of principle I am not going to discuss the negatives of eating chocolate on my blog.  I will happily justify it and can rant at you about the psychological benefits of consuming ridiculous amounts of chocolate!

Overall Reaction
Choose another box!
2/10

Saturday 13 July 2013

Avon Supershock Gel Eyeliner In Aqua Pop


The above video shows what the eyeliner looks like when used on a piece of paper and how smoothly it applies!  It is much easier to apply onto skin though because there is a slight texture to the paper!


The pencil


What the line looks like on paper


The pencil used on my eye


The pencil with my eye shut


After rubbing over my eye with three strokes with my hand!


After rubbing over my eye with three strokes with my hand!

Price I Paid
This normally retails at about £6 but it is frequently on offer for £3 or 2 for £6.

Design
This is a pencil eyeliner with a gel formula which is absolutely great. It is easy to use and unlike many pencils very easy to sharpen to a nice point which is a bonus.

Colour
It comes in a wide range of colours including black, blackberry, silver, aqua pop etcetc.  I really like this blue because it is vibrant without looking clown-like.  It is also slightly shimmer (not glittery) which is lovely.

Blue eyeliner looks great on most eye colours although when using blue eyeliner near blue eyes it actually makes the blue of your eye seem less vibrant which is a shame.  I would recommend that those with blue eyes who want to use blue eyeliner use a darker blue, navy eyeliner rather than lighter/brighter colours such as this avon pencil.

Texture
The texture of this product is absolutely amazing.  I really could not recommend it enough because it is possible to create a really smooth perfect line as the formula is more liquid than solid.  The only thing that is slightly annoying is that it needs a minute to dry before you properly open your eyes otherwise you end up with those halos on your upper eyelid.  Once it is dry though it does not budge at all, as you can see from the photos above after wiping it with my hand three times the formula has not moved at all which is extremely impressive.  It does need a good eye makeup remover to get it off though but if you don't mind scrubbing a little it does come off with any makeup wipe.

How To Apply
I find that it is easiest to apply this with one smooth movement from the inner corner of my eye to the outer corner with my right hand whilst stretching my eyelid out slightly to make the skin smooth and taught with the other hand.  I use this eyeliner in my waterline on my bottom eyelid and although it doesn't stay it seems to gravitate towards my eyelashes which just leaves a perfect line underneath my lashes.

Overall Reaction
This is one of my favourite eyeliners and it comes in some really jazzy colours so it is well worth the money!
10/10

Thursday 11 July 2013

Avon Big Colour Eyeshadow Pencil Burnished Copper and Golden Glamour


The pencil itself (minus lids)

Burnished Copper end of the pencil and swatches on paper


Golden Glamour end of the pencil

Swatch on my hand, Burnished Copper on the left and Golden Glamour on the right

How the burnished copper end looks on my friend Farheen's eye

How the burnished copper end looks on my friend Farheen's eye

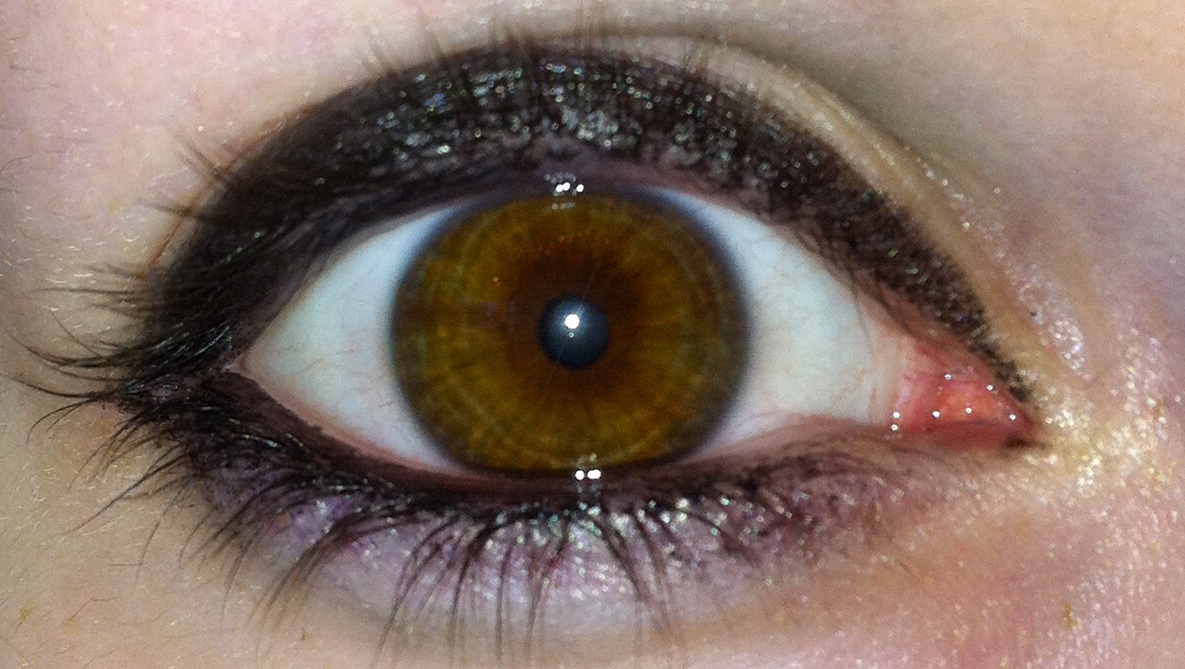
How the burnished copper end looks on my eyes

Eye shut, not the best photograph sorry!

Price I Paid
I paid about £3 for this in the Avon sale although I think it now retails at about £6.

Design
Pencil eyeshadow is fantastic because it is easy to apply in the right shape and much less messy than powder eyeshadows. Although I love the fact that this pencil is double ended, I think the burnished copper colour is much more useful and therefore would have liked to have been able to buy this separately in smaller packaging.  The other minor issue with eyeshadow pencils is they are much thicker than normal eyeliners and therefore you will probably end up needing to buy a suitable sharpener for them aswell but they are not too expensive from any drugstore.

Colour
I prefer makeup that is shiny and frosted to makeup that actually contains pieces of glitter because it tends to look much classier on and be easier to wear.  I find glittery items sometimes look nice, but I used to pile glitter on when I was about 13 and ended up looking like something out of the musical Pricilla  Queen Of The Desert.  I saw it recently, it was good fun actually but as it is based upon alot of drag acts I don't think i'll be cranking that look out around North London any time soon. 
The burnished copper side of this pencil is a really lovely brown shade with flecks of gold shine rather than glitter.  I think this side to the pencil is very pretty but it is quite intense and I found that it was a bit too harsh for my pale skin.  
As I still thought the colour was very pretty I found a friend with much darker skin to try it out on aswell.  This colour really works well against her darker skin because it blends in much better and the edges seem considerably less harsh. A real problem with using eyeshadow pencils is that they are often very difficult to blend in so I would only use quite natural looking colours. 
The other side of this pencil I am not particularly keen on as I think it is verging on the yellow side of gold rather than true gold.  I don't like yellow colours anywhere near my eyelids as my skin has yellow undertones to begin with so it just makes me look drained.  I didn't try out the other side on my friend either at the time but I would imagine she might feel the same way. 

Texture
This product has quite decent lasting power, it will last a good 5 or so hours but if you have slightly oily eyelids then it will start to crease a bit.  The good thing about pencils is that you can put it in a handbag for quick touch-ups.

Smell
No Smell

How to Apply
On my skin I just filled in all of my eyelid with the brown colour as I was in a slight rush and didn't have time to do it nicely.  You can see from the photos that it is possible to create a really good shape from this pencil but as the colour is quite dramatic I prefer something that is better blended against my skin. 
Against my friend's skin I used a different eyeshadow technique.  My friend has big beautiful eyes but prefers to do her eye make-up in a way to reduce the look of the size of her eyelids.  As the diagram below shows I only put shadow on the eyesocket and the eyelid closest to her eyelashes.  I applied it in three strokes it doesn't matter what order you do it in but just running the eyeshadow pencil along the eye in the place/direction of the arrows will create this look. Using a dark shadow for the outer edges and leaving the center bit out in the shape of a smaller eyelid breaks up the solid area of skin colour creating the illusion of smaller eyelids. It is best not to go too close to the inner eye with this look and be very light handed as you get towards it.  Don't go all the way into the inner corner it would create a weird looking empty oval shape on your eyelid instead which would look like you just outlined your eyelid and that is a bit strange.


Overall Reaction
This Avon eyeshadow pencil works really well and is very pigmented.  I don't like the golden side of the pencil but the copper side is very pretty.  Although I wasn't such a fan of it on my very pale skin, it looks great on Farheen so I am going to rate it based on people with slightly darker skin than me.
Overall reaction 8/10