Sunday 1 September 2013

Sugar Strip Ease Wax

Price I Paid
£12, can be bought off amazon quite easily.

How To Apply
You heat up the pot in the microwave until the wax inside melts.  You then spread the mix (when cool enough) on the area with the wooden spatula, apply a fabric strip and rip off in the opposite direction to hair growth.

Design
I usually use cold wax strips because it is far less mess but I did actually quite like this mix because it was very gentle and effective.

Colour
The wax is the colour of melted brown sugar.

Texture
It is quite a thick wax and you have to use it at its optimum consistency otherwise it becomes a bit of a mess.

Smell
The biggest positive about this wax is that because it is made of sugar it smells good enough to eat (but don't)!

Ingredients
Mostly melted sugar!

Overall Reaction
It would not convert me personally from using cold wax strips but it is definitely the best wax pot I have used from the warm wax ranges so I would certainly recommend it.
9/10


Saturday 31 August 2013

Macaroni Cheese Balls


Price I paid
I tried these in a kind of diner style restaurant in New York for $2.50.

Colour
What was most striking about this dish was the colour of the cheese it came with.  This is American squeezy cheese and is the kind of thing that fills all cheese lovers with nightmares.  I happen to be a real cheese lover and I immediately shunned the dipping cheese and meticulously scraped it off the macaroni balls praying that the cheese inside would be an alternative.

Taste
Nope, the cheese inside was also squeezy cheese.  I wanted to try these because I always think of Mac'n'Cheese as being an American treat.  It was not, it was a stodgy and I have thoroughly looked it up and the nearest this kind of cheese has been to well.. a cheese is by containing "milk and cheese culture" which is used in the production of cheese but is not really cheese itself.  I am not being a drama queen, any other English person presented with this would also be horrified!  
As an experiment, I did eat two and I can confirm they were balls of macaroni pasta surrounded in a thick blob of squeezy cheese.  

Ingredients
Hate to think about it.

Overall reaction
Spit them out..
0/10

Friday 30 August 2013

Korean Tasting Wines


Price I paid
My family ordered this little trio of Korean tasting wines whist in a restaurant in New York and they were a real experience.  I think it was about $15 for all three.

Colour
The nonju rine was a white colour, the black rasperry was similar to the colour of most red wines and the herb wine was like white wine with a greenish tinge to it.

Taste
The nonju wine is a milky rice wine and to me pretty much tasted like any dry white wine with added milk.  Having milk in wine seemed quite strange and unexpected but it wasn't actually unpleasant.
The black rasperry wine was very sweet and reminded me of dessert wine with Ribena? Again, I didn't dislike this but I wouldn't want to order a whole glass on my own.
Finally there was the herb wine, I really quite disliked this because it tasted like very dry white wine with a parsley smell and taste.  

Overall Reaction
Although I really enjoyed tasting all of these wines, I would never order a whole glass to myself.  I think that the "tasting wines" concept of three small glasses to share is fantastic though especially as they were three flavours I have never seen or tried before. 
8/10

Thursday 29 August 2013

Faux Beef Japanese Bake


Price I paid
I tried this "faux beef" dish at a Japanese takeaway restaurant in the food court of the Rockafeller Center in New York and it was just a few dollars.

Colour
On it's own it actually looks very unappealing so I think they have the right idea adding a little carrot and broccoli just to make it look somewhat prettier.

Taste
Although it looks pretty grim it actually tasted really nice! It was chunks of soya with a really nice kind of black bean sauce on that was not too spicy for me which was a plus.  I don't think it really needed the rice with it as there was not enough sauce to warrant it.

Overall Reaction
If I went back to New York I wouldn't make a journey specifically to re-order this dish but if I was nearby the Rockafeller Center I probably would go in and grab another one of these for a lunch.
8/10

Wednesday 28 August 2013

Poppy Seed Cake


Price I paid
I was served this "poppy seed crumble cake" while on a cruise on the Queen Mary 2 and the journey price included all food.

Colour
If I had not known any better I probably would have thought that this was a chocolate cake.

Taste
In my opinion, this was not a cake and I was thoroughly disappointed.  It was a thick dry crumbly mess with a layer of very dry, solid poppy seeds.  It could really have done with a layer of jam or a more spongy base.  It reminded me of the crust of a seeded bread without the nice spongy bit underneath.

Overall Reaction
I like the idea of putting poppy seeds in a cake, but this one just wasn't for me!
1/10

Monday 26 August 2013

Burrata


Price I Paid
I absolutely love cheeses, most of my meals incorporate cheese in some way.  This was a special on the menu in a restaurant in Little Italy in New York and the price was not specified.  I always crave this cheese as it is very difficult to get hold of in London so my dad just told me to order it.  However, when the bill arrived it ended up costing about $15 (although I would add it was 100% worth it!)

Colour
This is a soft, white cheese.

Texture
What is special about this cheese is that it is mozzarella that has been stretched along with cream to create a much softer texture and richer taste.

Smell
The smell is hardly noticeable.

Overall Reaction
I LOVE this cheese! The only place I seem to be able to find it in London is Watirose and unfortunately it has never actually been in stock so if anyone has any suggestions on where I can buy this please let me know!
10/10!!!

Sunday 25 August 2013

Flight to New York


These are just a few photographs I took on the way to New York from my seat in the plane.  I don't have a fear of flights at all but I really dislike being stuck in a small space for 8 hours and looking down. I actually took these photos on my camera to look at once I was back on the ground!

Saturday 24 August 2013

Jasmine Tea


Price I Paid
My dad bought this tea in a New York, Korean Restaurant for just a few dollars I don't remember the exact amount, sorry!

Design
I think the little slogan on the cup is sweet it says, "perfectly clear water instills honesty, sublimely fine tea installs faith."  
The cup itself is pretty cool as well because it contains it's own inbuilt tea strainer/infuser and a little lid.

Colour
The tea is a slightly yellow green colour.

Smell/Taste
I have combined these two because my opinion on all herbal teas is that it is really just "smelly water."   My real issue with this tea is that the majority of my perfumes contain jasmine and drinking water that smells like my perfumes seems to set off strange warning bells in my head that completely prevent me from enjoying any kind of herbal teas. In all honesty I am not convinced these kinds of teas have any particular taste other than warm water anyway.

Overall Reaction
I like the smell, but I wouldn't want to drink this at all!
1/10

Tuesday 20 August 2013

Spinach and Artichoke Dip


The image on the left is the dish I ate in America that I thoroughly enjoyed.  The only slight issue with this version of the dish was that it had been made using squeezy cheese which is this horrible yellow gloop that completely disgusts me.


After coming home from New York I was inspired to have a go at it and my version is the image on the right.
As usual my presentation is absolutely awful so use a bit of imagination or have a go at it yourself and do it better.  Sometimes I wonder whether I should have a disclaimer on this site because when it comes to makeup I am quite a perfectionist but when it comes to food I figure it all mixes up in my mouth anyway so it really doesn't matter what it looks like!

Price I paid/Ingredients
1 Can of Artichoke hearts - £1
2 bags of fresh spinach - £1 each
1 Tub of grated Parmesan - £2
2 garlic cloves - 20p
Three tablespoons sour cream - £50 a tub
Saucepan

How to Prepare
1. Drain and wash artichoke hearts out.  Simmer in boiling water for three minutes.
2. Drain water from artichoke hearts and put in a separate bowl for now.
3. Add some oil to the saucepan and add the spinach until it is all completely wilted.
4. Drain the spinach as often it can release a lot of water while cooking.
5. Put the cooked artichoke and wilted spinach back into the saucepan.
6. Finely chop and add the garlic cloves/sour cream/whole tub of parmesan
7. Put saucepan back on the heat and stir continuously until the parmesan has melted into the mix.
8. Put in a dish and serve!

Taste
This is an American style dish although often in America they will use cream cheese instead of parmesan but as per usual, I didn't have any!  Tastes great as a side dish to a potato or as a tortilla chip dip. 

Overall Reaction
I personally thought this dip really worked well although I possibly would have used cream cheese instead of parmesan for a thicker consistency.  I also do not like artichokes in this quantity but that is just my preference so I would have either used more spinach or less artichoke.
8/10 

Sunday 18 August 2013

Gorgonzola Cheese Sauce/Dip


Price I paid/Ingredients
1 block of Gorgonzola - £2 
2 teaspoons of mayonnaise - £1 a jar
1 tablespoon of double cream - 50p a tub
1/2 teaspoon butter
Saucepan

How to Prepare
This is yet another dish that tasted much better than it looks!  The reason it looks lumpy is because I forgot to take the rind of the cheese which was quite a big mistake to be honest!
1. Cut the rind off the Gorgonzola!
2. Melt the butter in the saucepan on a very low heat to grease the bottom of the pan to stop it sticking so much.
3. Add the gorgonzola to the saucepan and wait for it to start to melt.
4. Add the mayo/cream and keep stirring until all the cheese has melted.
5. Serve! I served this sauce over potatoes and the photograph is of it straight out of the hot pan.  You can also wait for it to cool a little and the cheese to become much thicker and use it as a dip for vegetables/tortilla chips etc!

Colour
Off white cheese colour!

Taste
Gorgonzola is a very strong cheese so steer clear if you aren't into that kind of thing.  You can add a few spices e.g nutmeg if you want to create something a little more different but I didn't fancy that.

Smell
Gorgonzola actually does not have such a strong smell despite the strong taste.

Overall Reaction
I would definitely make this sauce/dip again. 
10/10

Saturday 17 August 2013

Avon Advance Techniques Morrocan Argan Hair Oil

Price I Paid
It retails at £5.50 but is currently on offer for £3.30

Design
I think the design of this product might be one of its main issues.  When you hold down the pump it disperses far too much oil I would probably only use about a 1/4 of what comes out which is very annoying as I have to waste product/get rid of the rest of the oil from my hands.  

Colour
The oil is yellow in the bottle but doesn't make a difference to the colour of your hair once applied.

Texture
I am very much in two minds over this oil.  On one hand it does make my hair feel quite nourished but on the other hand it is incredibly greasy and makes my fine hair look very oily if I use even slightly too much.  I think for thick, dry hair this would be a great product but for those with fine, dry hair it has to be used very carefully.  I also would only use this product if I was straightening my hair because I find it makes my natural curls go kind of flat.

Smell
The smell is not offensive just smells a little oily which makes sense.

Ingredients
Contains Argan oil which is made from the kernals of the Argan tree which is native to Morocco.

How To Apply
What I found works best for my hair is to apply it an hour before I have a shower so that my hair can absorb the moisture but the excess can be washed off in the shower with shampoo.

Overall Reaction
I can see the appeal of this product for people with very thick, dry hair but for my hair I have products that work much better.
6/10


Friday 16 August 2013

Easy Banana Muffins


Price I paid/Ingredients
1 egg - £1.50 for a box
1 cup of caster sugar - £1 for a whole bag
2-3 tablespoons of butter/margarine - £1 a small tub 
2 teaspoons of vanilla essence - 79p for a jar
1.5 cups of self raising flour - £1 for a huge bag
A splash of milk - 49p for a small bottle
2-3 bananas depending on how "bananarey" you like them
Cupcake/muffin cases
Cupcake tray
Saucepan
Pre-heated oven to 150 degrees

How to Prepare
1. Add the butter (or if you forget to buy butter I successfully used Bertolli spreadable butter with a hint of olive) to a saucepan and heat at the lowest possible gas setting until melted
2. Add the caster sugar to the saucepan, if it starts to bubble at all you need to take it off the heat until it settles.  You want the sugar to melt just a little bit and mix with the butter.
3. Mash the bananas up well with a fork and then add them to the saucepan.
4. Add the vanilla essence and egg.
5. Add the flour, mix thoroughly. If the mixture looks very thick you can add a little splash of milk but be careful not to add so much it becomes watery it should be thick like cream cheese consistency.
6. Put the cupcake cases into the tray and use a spoon to half fill each cupcake case with mix.  Use as many as you need until you run out.
7. Put in the oven on 150 degrees, it should take about 20-25 mins to cook although watch them and take them out when the tops start to look a golden brown colour.
8. Take them out the oven when ready, let them cool and then serve!

Note:  I considered icing them but I felt like it would ruin the banana flavour.

Taste
I added two bananas to my mix and I found this to be plenty, they tasted yummy and quite strongly of banana.  I think these would make a great, quick breakfast snack!

Smell
The smell filled up my whole house which is my favourite thing about cooking!

Overall Reaction
I would definitely make these again. They were incredibly fast to make it took me 5 mins to mix all the ingredients together and get them in the oven.  Then just the time waiting for them to cook. 
10/10

p.s Sorry I haven't been very consistent in posting recently, I have been very busy with holidays etc!

Monday 12 August 2013

Breakfast In Bed


I have just returned from a holiday in New York and we took a cruise home on the Queen Mary 2. The thing I miss most about it was definitely breakfast in bed on the ship!  Every morning someone would knock on my door and bring me a tray of food and a cup of tea (ordered the night before).  I could then leisurely eat my breakfast and watch a film/fall back to sleep for a bit.

The only slight negative of 7 days of breakfast in bed and feeling like royalty is that now I am home and walking downstairs to get cereal all seems to be a lot of effort. 

Thursday 8 August 2013

Peanut Butter Cups Recipie

Price I paid/Ingredients
1 large bar Cadbury's Dairy Milk £1
1/2 jar smooth peanut butter £1 a jar
3ish teaspoons of butter 50p a block
4-5 teaspoons icing sugar £1 a bag 
10ish paper cupcake cases any size you want 70p for 30
You will need 2 microwave safe bowls as well and some teaspoons

How to Prepare
This is really easy to make just follow these steps:
1. Make the chocolate base by breaking up half the bar of chocolate into small squares.  Put them into a microwave safe bowl and add 1 teaspoon of butter. Put in the microwave for 30 seconds.  Take it out and add 2 teaspoons of peanut butter to the mix.  Stir, then heat it for another 30 seconds. If the mix is not melted yet you can put it in for a further 30 seconds. 
2. Put a teaspoons worth of the melted mix into each cupcake case.  You can put in more/less depending on the size of the cases you choose.
3. Take a separate bowl and mix roughly half a jar of peanut butter with about 4/5 teaspoons of icing sugar and a teaspoon of butter.  Melt in the microwave for 30 seconds, you do not want the peanut butter to be too melted because you want it to be a nice blob on top of the base.  You could wait for the base to completely set and then spread it out like a Reece's peanut butter cup but I am too impatient and I wanted alot of peanut butter.
4. You then do need the peanut butter and base to harden before you add the top layer of chocolate so put them in the fridge for 20 mins and come back to them.
5. You then do step 1 again and pour about a teaspoonful of mix over the peanut butter to hide it and leave for a further 20 mins in the fridge.  Unfortunately I ran out of chocolate for this step so mine were not evenly covered (also because we ran out of cutlery as it was all in the dishwasher which I blame my brother for so I was using a cake fork to mix/spread it) but I promise they taste much better than they look!

Colour
Milk chocolate brown, but with hints of lighter peanut butter brown if you, like me, fail to cover it.

Taste
Exactly like a Reece's peanut butter cup there really is hardly any difference! If you don't like those peanut butter cups definitely stay clear of this recipe.

Smell
Melting peanut butter smells so good and it fills up the whole kitchen which I love!

Health Benefits 
Um...... well peanuts are healthy? I used milk chocolate AND butter so maybe I can count that as a dairy product and therefore part of my daily calcium intake..?? Or maybe not...

Overall Reaction
These are delicious even if they look kind of dodgy! 10/10!


Tuesday 6 August 2013

Holiday Makeup Essentials


These are my holiday essentials!

1. Two hair bands
Great when it is hot and I can't be bothered to sort out my hair!
2. J'adore Dior mini perfume
I was given a set of minitures which has proven very useful for holidays, each bottle probably lasts me 3 or so weeks.
3. 17 Pressed Powder in Neutral
When it is hot oily makeup can look shiny so I use this to tone it down
4. Illamasqua nail varnish in Jan.
I don't want the hassle of changing my nail colour on holiday so I just take one fairly neutral shade
5. Nail Clippers
Always useful!
6. Bourjois Flower Perfection Foundation in 51
I take this foundation as it is a powder formulation that makes my skin matte.
7. Bourjois 10 hour sleep effect foundation in 71
This is an oilier foundation that is still light but is good if I have dry skin.
8. MAC 190 foundation brush
Although I swear by stippling brushes, stuffing them in a makeup bag ruins the bristles so I just take a normal flat brush.
9. Revlon Lip Butter in 045
Moisturising with colour!
10. MaxFactor lipstick in 110
Amazing lasting power it will stay on all night.
11. MaxFactor lipstick in 040
"
12. Avon Rasperry Lipsalve
I use this over the MaxFactor lipsticks as they can be slightly drying
13. Benefit BrowZings in light
I wouldnt go out without it
14. Benefit HighBrow
Makes you look fresh faced no matter what time in the morning it is!
15.Tweezers
Good idea to take some if you are going away for a while.
16. Lancome HydraZen SPF15 face moisturiser
I always put on moisturiser before my makeup and this one is good and has spf
17. Bourjois Blusher in Rose D'Or
Comes with a handy brush inside the lid!!
18. MAC concealer in NC15
Great for a quick coverup before going out if I can't be bothered with foundation
19.Illamasqua eyeshadow in Control
A neutral colour that goes with everything
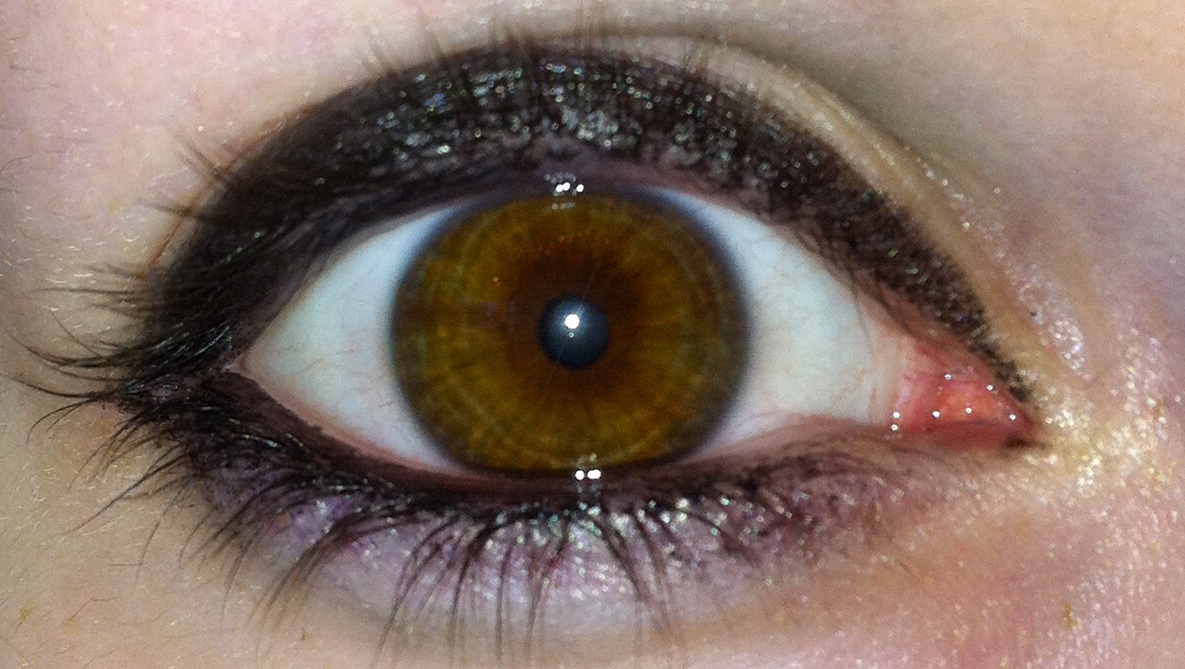
20. Chanel Waterproof eyeliner in 10 Black
My favourite eyeliner ever!
21. Lancome Black Drama Waterproof Mascara
This mascara does not budge no matter what which makes it perfect for wearing in the day all the way into the night!

Sunday 4 August 2013

How Mirrors Are Made


I found this video while searching YouTube.  As you might have seen in my other posts I really do love knowing how things are made so I found this video quite interesting.  It is 5 mins long so I would suggest letting it load and skipping forward bits where there is lots of waffle from the annoying voice over person!

Saturday 3 August 2013

Roast Vegetables in Palma!


Thought I would write a quick post about these yummy roast vegetables that I ate on a recent holiday to Mallorca.  After a few days worth of McDonalds and Subway at the Magaluf strip we decided to head to Palma for some real food.  It was just vegetables with a hint of soy sauce. I don't know whether it was just the fact that we had found real vegetables, or that it actually was as good as I thought, but at the time it was the best pile of vegetables I had ever eaten. 
On a side note courgettes are vile, they are wannabe cucumbers, squashy with no taste, although on this occasion I ate them.  I had not seen anything green on the plate for a week other than the limp lettuce in my Subway sandwich (which I might add kept being upgraded to a footlong which now horrifies me).
If anyone reading this visits Palma, make sure you head on down to the lovely Italian Restaurant near the marina.  But you will have to guess which one since I don't remember the name of it....


Friday 2 August 2013

MAC concealer

Coverage of a brown pen line on my hand

The packaging


The packaging

Price I Paid
I paid £11 for this product from the MAC store.

Design
I quite like the design of this product, small enough to fit in a handbag but still contains alot of product.  I also really like that you can see through the lid of the packaging to have a proper idea of what the colour is. 

Colour
This is NC15 which is a yellow toned concealer.  

Texture
I really do not like MAC foundations as I find the colours are not quite right for me and the formulas end up patchy but this concealer is pretty good actually.  I think this particular concealer really needs to be used on its own without any foundation.  When I covered it with foundation I found that my foundation seemed to drift off the areas where I had applied this product and had become quite powdery even when it was oil based foundation. It does have amazing coverage though as you can see from the picture above and therefore if you have found a shade close enough to your skin colour you probably don't need to put any foundation ontop.

Smell
No smell

How To Apply
I would strongly recommend applying this product with a brush if you want to cover anything specific like a blemish etc and using your finger to smudge the edges of where you have applied it to blend it in.  It does work very well as a concealer.

Overall Reaction
I normally buy the natural collection concealer which retails at £1.99 and works better under my foundation while there being more product for my money.  Although this MAC concealer works great if I just want to use a concealer on its own.
8/10

Wednesday 31 July 2013

Benefit BadGal Eyeliner


The eyeliner itself - lid is a bit wonky because I have already used half of it up!

The eyeliner on my eye

Eye shut

The eyeliner drawn on a piece of paper


After rubbing it slightly with my hand

Almost all of it has gone!

Price I Paid
£15

Design
This is a pencil eyeliner, it is quite a thick eyeliner which is good for creating a smokey eye look rather than a defined, clear line.  You will need to buy a large sharpener for this pencil which is annoying.

Colour
A rich black, the colour is intense!

Texture
The texture of this eyeliner is good and bad.  There are so many rave reviews about it so when I had the opportunity to try it I was so disappointed.  The good part is that it creates a nice smokey look quite easily and glides on smoothly.  
The bad part is that my eyes were already slightly watery because I have the dreaded hay fever at this time of year.  To be fair this product does not claim to be waterproof they actually have another pencil that does so this may be partially my fault.  What I could recommend this eyeliner for would be any makeup artist interested in creating a horror film because it created perfect black mascara drip tears down my face as soon as they started watering.  I think that anyone with oily skin should also avoid this product as it has hardly any staying power whatsoever.

Overall Reaction
It is not long wearing but it would look great for a few minutes for a photograph or for longer if you are acting in a horror film.
3/10

Tuesday 30 July 2013

Further Contouring

These next few steps will show you how to even out some more advanced features.  You can add these additions to the original contouring post that can be found by clicking here.


Double Chin
Shade underneath the face to hide a double chin slightly.  Highlight the centre of the chin to move the focus towards the face and away from the shading underneath the face.


A Longer Nose
To hide a longer nose shade just under the tip of it to take the emphasis away from the botttom of it and reduce any shine that might usually make it more obvious as well.


A High Forehead

To hide a higher forehead shade over all of it close to the hairline reduce the size.


A Wider Nose
To reduce a wide nose shade over the sides of it slightly to slim it.


A Wider Forehead
To reduce the size of a wide forehead shade either side of it as shown in the diagram and this will balance it out with the rest of the face.

Sunday 28 July 2013

Contouring For Face Shape


What is Contouring?
In the makeup industry, the idea face shape is considered to be the perfect oval.  The point of contouring is to highlight and shade the face to create a more "desirable" face shape.  I personally think that the concept of trying to alter your face shape in itself is not desirable.  In my opinion contouring should be used for what the name suggests, create a sense of depth to the facial features.  E.g by highlighting cheekbones and shading in temples you create a toned more interesting face.

Understanding the diagrams below

1.Do these steps after your usual foundation/concealer routine.
1. You need to decide on your face shape.  I have focused on the four main face shapes, heart, long, round and square. Look at the pictures and decide which one is closes to your own face.
If you have a perfect oval face you should just stick to using the blusher tutorial on its own.
3. The diagrams show the face shape and then the dark brown patches emphasise the areas to contour and the white areas emphasise the areas to highlight.  


How to Contour
To contour the face you need to buy a foundation one or two shades darker than the one you usually use.  You need to look for a foundation with the same yellow/pink undertones as your usual foundation so it is often best to stick to the same make.  You can also use a darker brown powder/cream but you must use this with a very light hand otherwise it will look like you have strange patches on your face rather than countours that just add depth.
Using a darker colour to shade in areas of your face will slightly hide certain sections.  Using it in this way will emphasise the lighter sections of your face even more. 

How to Highlight
To highlight you need a foundation slightly lighter than your usual one, again with the same undertones as your original foundation.  Or what is best is to buy a lighter powder or invest in an actual highlighter such as Benefit High/Moon beam.  Highlighters are usually just a slightly lighter, sometimes shiny cream that will brighten and lighten certain parts of your face.


Heart Face

A heart shaped face is wider at the top than the bottom.  So the aim is to shade in the sides of the face by the temples to create a narrowing effect.  At the same time you can shade slightly around the chin to add a little extra depth and balance out the shading at the top sides of the forehead.

You should highlight above the cheekbones to widen out the center of the face and create a focus towards the middle.  Also you might want to put a tiny bit of highlighter just on the chin as a balance so you do not just have highlighted cheeks.  Do not put any highlighter on your forehead as that will make it seem wider.


Long Face

When contouring a longer face you want to try and give the impression of a slightly shorter face so you shade out and contour the bottom of the chin and the top of the forehead.  Do this very lightly so that it is subtle. 

To widen the face at the center it is a good idea to highlight just above the cheekbones.

Round Face

A round face needs more difficult contouring to give the impression of more defined features. You should shade the two edge sides of the forehead to create a more oval shape to the face and contour underneath the cheekbones to make them even more prominent on the face.  You can also shade on the sides of the chin for a little extra depth.

You should highlight the forehead in the centre as a curve to create the impression of a longer forehead and highlight the centre of the chin as well to extend the face downwards from the middle. It is also a good idea to highlight the cheekbones to add some height to the center of the face.


Square Face

Contouring a square face is to soften the features up for a less defined look.  You can shade in the top countours of the forehead to soften the angles and the jawline to do the same at the bottom of the face.

You should highlight the cheekbones, middle of the chin and forehead in a circular design to round out the face a bit.


Saturday 27 July 2013

Illamasqua Nail Varnish In Jan

The Bottle

One coat of the polish


One coat of polish


The brush


Two coats of colour


Two coats of colour

Nails after three days

Price I Paid
This retails at £9-14 depending on where you shop.

Design
The bottle looks quite smart a bit like the Chanel glass bottles but obviously with the Illamasqua logo on.  The brush is pretty thin and rubbish unfortunately which made application more difficult but this might be good if you have very small nails.  What was really odd was that the lid fell off after the first day and I have no photo of it but I am now left with a brush attached to what looks like the inside of the cap? I can't work out if this is supposed to happen!

Colour
I really like this colour varnish it is quite unique and I have never tried it out before.  It seemed to go with almost everything I owned which was nice.  

Texture
This nail polish is very opaque and I could almost have got away with just using one coat!  It lasted three days without chipping but on the fourth day I ended up with a huge chip on my thumb and alot of the polish seemed to come off all at once.  Even so for the three days it lasted it did pretty well and looked great.  It was not a shiny as other polishes I have but I think that added to the charm of the colour.

Smell
Nail polish smell..

Overall Reaction
I was very impressed with this polish and would probably consider buying Illamasqua polishes again.  The only slight problem is that Illamasqua is a theatrical make and therefore a lot of the colours are quite "quirky" and not suitable for everyday wear.
9/10


Thursday 25 July 2013

A Really Basic Bloody Mary

Ingredients
  
Quantities


Final Drink


Price I Paid
£1 for the whole carton of tomato juice.  I think the longer life cartoned juice tastes better for this than the fresh juice but that is just up to you.
£1.69 for the whole bottle of tabasco sauce
£1.80 for the whole bottle of Worcestershire sauce
Optional - Shot of Vodka for the alcoholic version


How to Prepare
Two or three drops of tabasco - more if you like it quite spicy!!
A good splash of Worcestershire sauce
Optional - add a shot of vodka 
Fill up the rest of the cup with tomato juice and stir!

Colour
Bright blood red as the name suggests!

Taste
A spicy tomato drink!

Overall Reaction
This is a really quick and healthy drink to make (minus the alcohol if you added that)
10/10 

Tuesday 23 July 2013

Hotel Chocolat Cherry Deluxe Chocolates - Review


Price I Paid
£3.50

Design
Quite a nice design, nothing special though

Colour
White amaretto truffle and a kind of red kirsch cherry jam?

Texture/Taste
It is described as a succulent kirsch soaked cherry surrounded by silky soft amaretto truffle.  After looking at the reviews online it is clear that this chocolate was once as it should have been but although I still enjoyed it, it was not quite what I was expecting.  It is described as being a cherry soaked in kirsch but it is actually cherry and kirsch jam which is disappointing.  The chocolate is nice and so is the amaretto truffle filling but I would have much preferred an actual cherry as this is supposed to be a luxury brand!

Overall Reaction
Its not bad, but I have had better and cheaper versions of this particular product.
6/10